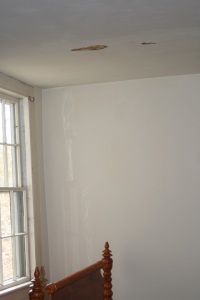
 This winter Connecticut was “blessed” with an overly abundant amount of snow. The thawing and freezing of all this snow created ice dams on the edges of many roofs in the region, including ours. Normally raking all the snow you can reach off of the roof will keep ice dams from forming, but the snow was so deep several times this winter that raking didn’t solve the problem.

The dark spots are where the water poured out through a crack in the plaster.
Fortunately for us, lathe and plaster walls and a lack of insulation is a plus when you have water seeping into your house and running through your walls and ceilings. The water runs out through any crack in the plaster that it can find, which happens pretty quickly, and that helps keep mold from growing.
It’s taken us several months to work our way through filing an insurance claim, finding contractors who know how to repair real plaster and getting estimates. Along the way we had a company come in with a huge dehumidifier and four industrial fans, which made the inside of our house sound like an airport runway for 6 days, which is an experience that I hope you never have.
Last Wednesday our contractor called to say that he’d had a cancellation and could start on our repairs on Friday. That gave us a little over 24 hours to clear everything out of four rooms, which is just the beginning. In total we are having the plaster repaired and painting done in ten rooms, two hallways and a stairway. We decided to forge ahead at full tilt and get all of the walls and ceilings that need attention done at once. 🙂
Right now I’m feeling a little frazzled. Sitting in the rooms that aren’t currently being worked on, is like living in an episode of Hoarding – Buried Alive. We have things piled everywhere. My new studio building is full of refugee items from the house and we’ve just finished loading all the pieces of our bed and four antique trunks into our van! LOL

Original color exposed.

Four layers of paint in 221 years. We had to resort to scraping this paint to uncover the layers, as the second layer of paint resisted chemical strippers.

This was taken in the same room as the above photo. Here you can clearly see the second layer of paint, which would not budge when attacked with a citrus based stripper.

I got lucky on this step, the paint bubbled and peeled away down to the original paint all on it's own!
I’m returning most of the paint colors to their 220 year old originals. So add in a couple of armfuls of paint samples to the rest of the general confusion around here.
I’ll be posting updates on this current chapter of our old house adventure as time and sanity permit 🙂

This shows one layer of plaster on water damage in our upstairs bathroom.

Initial crack repair and first coat of plaster in main floor bedroom.

Compare this ceiling, with it's first coat of plaster, to the photo of this same ceiling earlier in this post.
Read my previous post Snowy Day.
Read Full Post »
 Just when we were starting to get a few things back to normal, after dealing with the water damage we experienced due to ice dams over the winter, we have been blessed with a tropical storm! It certainly could have been worse and I’m quite thankful that Irene wasn’t a full-fledged hurricane, but really – this is beginning to get old!
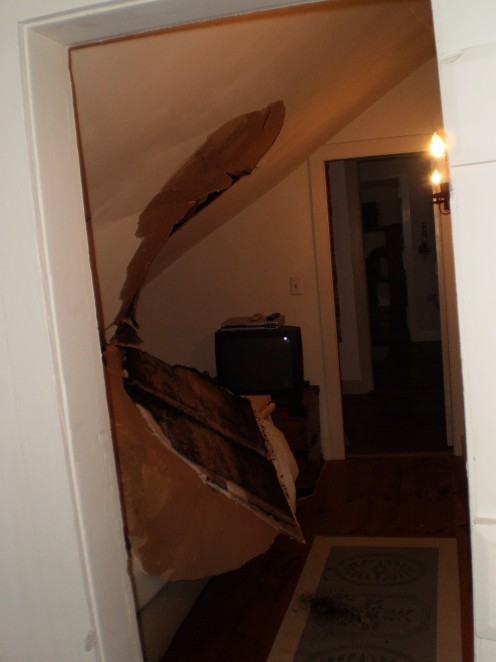
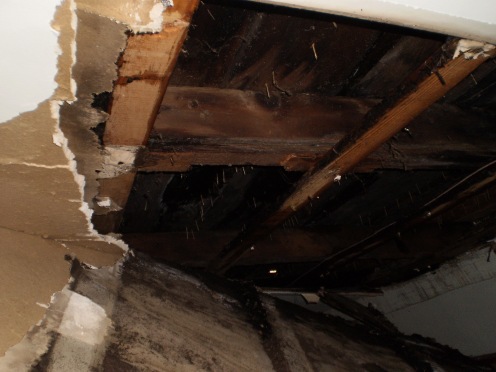
 So far, cross your fingers, none of our two century old maples have come crashing down. Our main problems are all rain related. The heavy, constant downpour caused several gallons of rain to sneak into a small crevice next to the center chimney, run down the bricks and exit through the ceiling of the parlor. A huge mess to be sure, though not our main woe. Windblown shake shingles and the fore mentioned deluge combined to cause the ceiling in one of our upstairs hallways to collapse.
 That particular part of the house was originally an attached barn that previous owners converted into living space. Not being old house purists, and undoubtedly working within a budget, the then owners used sheet-rock for the walls and ceilings in that hall. Bad move! Give me plaster any day. When sheet-rock gets wet it melts faster than the Wicked Witch of the West!


